If you’ve got a tear in your laptop bag, you’re probably wondering, “How do I repair a tear in my laptop bag?” Thankfully, it’s not as difficult as it seems. You can quickly patch up that tear with the right supplies and a few simple steps!
In this guide, we will take you through the steps required to repair a tear in your laptop bag, so you can get back to carrying your laptop around safely and in style.
How to Repair a Tear in a Laptop Bag
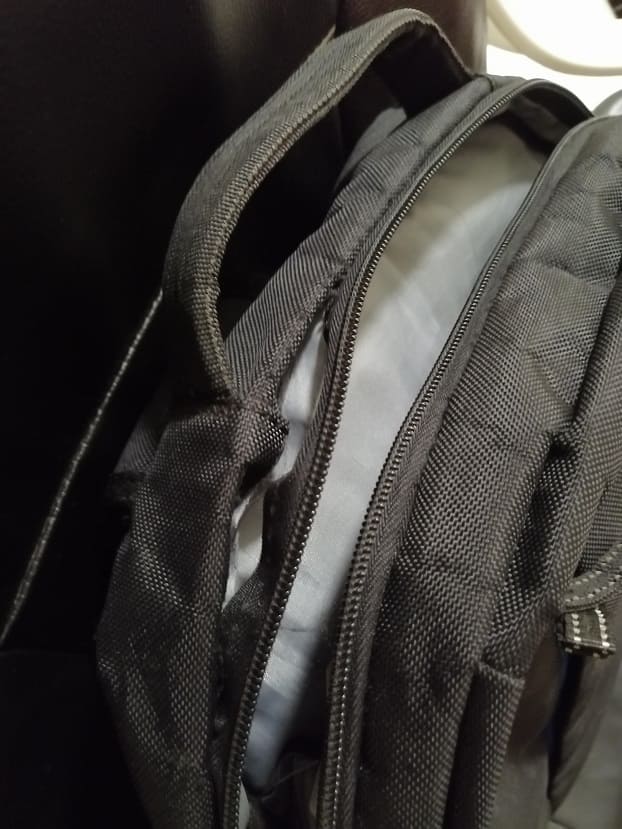
Laptop bags are essential for protecting our valuable laptops from damage when we’re on the go. But what happens when your laptop bag gets a tear?
Repairing the tear is important not only for aesthetic reasons but also for protecting your laptop. Here’s a comprehensive guide on how to repair a tear in your laptop bag.
Assessing the Damage
The first step in repairing a tear in your laptop bag is to assess the damage. Identify the size and location of the tear, as this will determine the best course of action. If the tear is small, you can repair it yourself. You may need to take it to a professional if it’s large.
Also, determine the type of material your laptop bag is made of. Laptop bags can be made from various materials, including nylon, polyester, canvas, leather, and others, and different materials require different repair methods.
Materials Needed
You’ll need a few essential materials to repair a tear in your laptop bag. These include:
- Fabric glue
- Needle and thread
- Scissors
- A patch of the same material as your laptop bag
- A sewing machine (optional)
Repairing the Tear
Now that you have the necessary materials, it’s time to repair the tear. Here’s a step-by-step guide on how to do it:
- Clean the area around the tear using a damp cloth to remove dirt or debris.
- Apply fabric glue around the edges of the tear to prevent it from getting bigger.
- Cut a patch of the same material as your laptop bag, ensuring it’s slightly larger than the tear.
- Place the patch underneath the tear and use the needle and thread to sew it onto the tear, making sure to sew through both the patch and the bag.
- Use the sewing machine (if you have one) to reinforce the stitches and ensure the patch stays in place.
- Trim any excess thread or fabric.
If the tear is too large to repair using this method, consider taking it to a professional.
Preventing Future Tears
To prevent future tears in your laptop bag, there are a few things you can do. First, avoid overloading your bag with too much weight, which can pressure the seams and cause tears.
Also, avoid dragging your bag on rough surfaces or sharp objects. Finally, store your laptop bag safely when not in use.
Conclusion
Repairing a tear in your laptop bag is essential for protecting your laptop and ensuring your bag lasts for as long as possible.
Following the steps outlined in this article, you can quickly and easily repair a tear in your laptop bag. Remember to assess the damage, gather the necessary materials, and take preventative measures to avoid future tears.