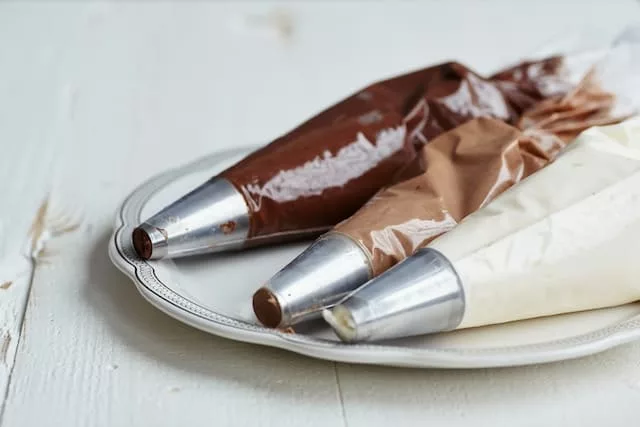
If you’re ready to take your baking skills to the next level, then it’s time to learn how to make a piping bag. A piping bag is essential for bakers who want to create beautiful designs on cakes, cupcakes, and cookies.
Making your piping bag is cost-effective and allows you to customize the size and shape. In this article, I’ll take you through a step-by-step guide on making this type of bag.
Step 1: Gather Your Materials
The first step in making a piping bag is gathering all the necessary materials. You’ll need a roll of parchment paper, a pair of scissors, and some tape. You can also use wax paper, but parchment paper is sturdier.
Step 2: Cut a Square of Parchment Paper
Cut a square of parchment paper that’s large enough to create the size of the piping bag you need. For example, if you want to make a small piping bag for writing on cakes, cut a 12-inch square.
Step 3: Fold the Parchment Paper
Fold the parchment paper in half diagonally to create a triangle. Ensure that the edges line up perfectly to create a sharp point at the bottom of the triangle.
Step 4: Create a Cone Shape
Next, fold the triangle in half again to create a smaller triangle. This will form the cone shape of your piping bag. Make sure that the edges line up perfectly again.
Step 5: Cut the Tip of the Cone
Cut off the tip of the cone using scissors to create a small opening. You’ll need a small opening if you’re making a piping bag for writing. You’ll need a larger opening if you’re making a piping bag for cupcakes.
Step 6: Roll the Parchment Paper
Now it’s time to roll the parchment paper into a cone shape. Start at the wide end of the triangle and roll the parchment paper tightly around your fingers. Ensure that the point at the bottom of the cone is sharp and the opening is at the top.
Step 7: Secure the Piping Bag with Tape
Finally, use a small piece of tape to secure the bag. Wrap the tape around the top of the cone, ensuring it’s tight enough to hold the bag closed but not too tight that it rips the parchment paper. You can also use a bag clip if you have one.
Congratulations! You’ve just made your own piping bag. Now you can fill it with your favorite frosting or icing and decorate your cakes, cupcakes, and cookies.
Tips and Tricks
- Use a ruler to measure the square size you need to cut, especially if you’re making multiple piping bags of the same size.
- Make sure the parchment paper is smooth and free of wrinkles before folding it.
- If you’re having trouble rolling the parchment paper, try rolling it around a cylindrical object like a rolling pin or a clean cardboard tube.
- Experiment with different sizes of piping bags to see what works best for your needs.
- If you’re working with hot liquids, like melted chocolate, use a plastic bag instead of a homemade parchment paper one. The heat can cause the parchment paper to break or tear.
Can You Use a Ziploc Bag as a Piping Bag?
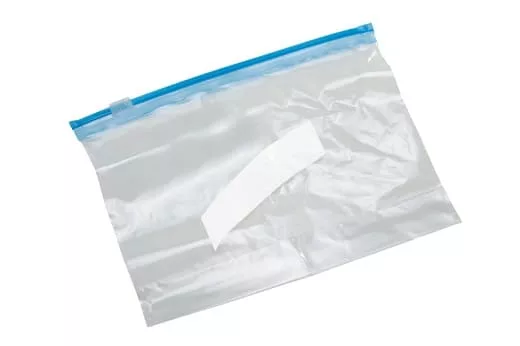
If you’re in a pinch, you may wonder if you can make do with household items for your baking needs. Ziploc bags are an easy and convenient alternative to traditional piping bags that you can use to pipe dough or frostings.
Although less reliable or leak-proof than a proper piping bag, using a Ziploc is possible – but there are some things to consider first.
Size is one of the most important considerations when using a Ziploc Bag as a piping bag. The larger the bag, the better, so look for one large enough to contain all your ingredients without spillage. You also want to ensure it has an airtight seal so nothing spills out.
Once you’ve chosen the right size, it’s time to prepare your Ziploc Bag. First, snip off one corner from the side of the bag (not the top) to create an opening to pipe the frosting or dough through.
You can customize this opening depending on how wide or narrow you want it to be – just be careful to keep it; manageable otherwise, nothing will come out!
Hold it at a 45-degree angle to pipe with Ziploc Bag with the corner cut down. Squeeze gently to release the mixture, and use a circular motion to create your desired shape. Practice on parchment paper before moving on to your finished product.
Pro Tip
While Ziploc Bags can be used as a piping bag in a pinch, you should always purchase a proper piping bag for more reliable and consistent results.
With a traditional piping bag, you’ll have better control over the thickness of your frosting or dough due to its strong construction and non-reactive material, so if you’re looking for something longer-lasting – opt for an actual piping bag instead.
Conclusion
Learning how to make a piping bag is a simple and cost-effective way to take your baking skills to the next level. Following these easy steps, you can create a custom bag perfect for decorating cakes, cupcakes, and cookies.
With some practice, you’ll be able to master the art of making beautiful designs with your homemade piping bags. So get creative and have fun!